- English
- French
- German
- Portuguese
- Spanish
- Russian
- Japanese
- Korean
- Arabic
- Greek
- German
- Turkish
- Italian
- Danish
- Romanian
- Indonesian
- Czech
- Afrikaans
- Swedish
- Polish
- Basque
- Catalan
- Esperanto
- Hindi
- Lao
- Albanian
- Amharic
- Armenian
- Azerbaijani
- Belarusian
- Bengali
- Bosnian
- Bulgarian
- Cebuano
- Chichewa
- Corsican
- Croatian
- Dutch
- Estonian
- Filipino
- Finnish
- Frisian
- Galician
- Georgian
- Gujarati
- Haitian
- Hausa
- Hawaiian
- Hebrew
- Hmong
- Hungarian
- Icelandic
- Igbo
- Javanese
- Kannada
- Kazakh
- Khmer
- Kurdish
- Kyrgyz
- Latin
- Latvian
- Lithuanian
- Luxembou..
- Macedonian
- Malagasy
- Malay
- Malayalam
- Maltese
- Maori
- Marathi
- Mongolian
- Burmese
- Nepali
- Norwegian
- Pashto
- Persian
- Punjabi
- Serbian
- Sesotho
- Sinhala
- Slovak
- Slovenian
- Somali
- Samoan
- Scots Gaelic
- Shona
- Sindhi
- Sundanese
- Swahili
- Tajik
- Tamil
- Telugu
- Thai
- Ukrainian
- Urdu
- Uzbek
- Vietnamese
- Welsh
- Xhosa
- Yiddish
- Yoruba
- Zulu
Molybdenum Wire Installation Instructions
2024-01-05 18:00:06
Molybdenum wire for cutting machine installation instructions
The steps for installing molybdenum wire before processing are as follows:
1. The operator stands behind the silk tube.
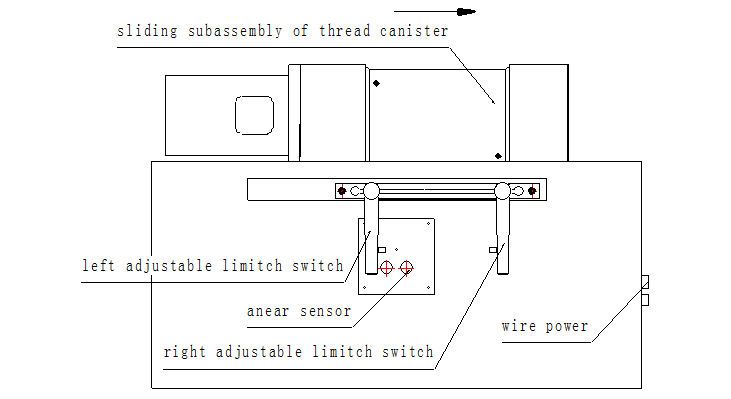
2. After the machine tool is energized, actuate the button switch on the right side of the package to move the upper sliding part of the package to the right position and stop. The left and right impact blocks were adjusted and placed at the maximum position of the stroke. As shown below:
3, install molybdenum wire according to the following schematic diagram:
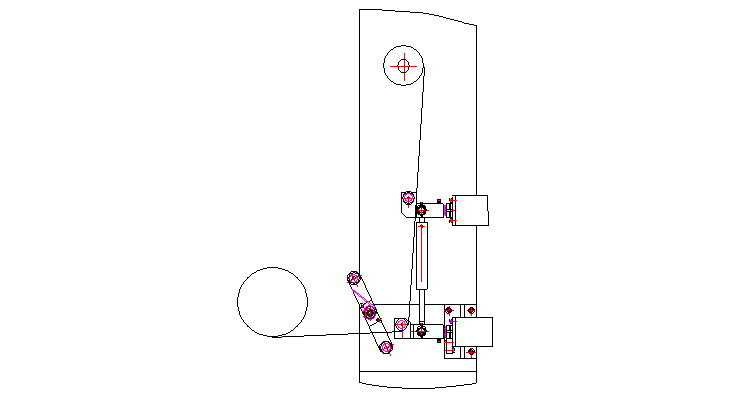
Fix the molybdenum wire to the screw on the left side of the cartridge as shown above.
Adjust the wire speed: Adjust the knob of the drive of the wire barrel, which means the 15 or 20 position (the adjustable range of the drive is 0-50).
Open the right silk tube switch, rotate the silk tube, slide the whole part to the left, the wire is evenly wound on the silk tube.
According to how much wire is needed, stop the rotation of the spool.
Note: During this operation, the left and right impact blocks must be adjusted to the maximum position of the left and right strokes to prevent sudden reversal during the operation, resulting in wire wrapping.
4. Install the wire to the entire wire transport system according to the following illustration.
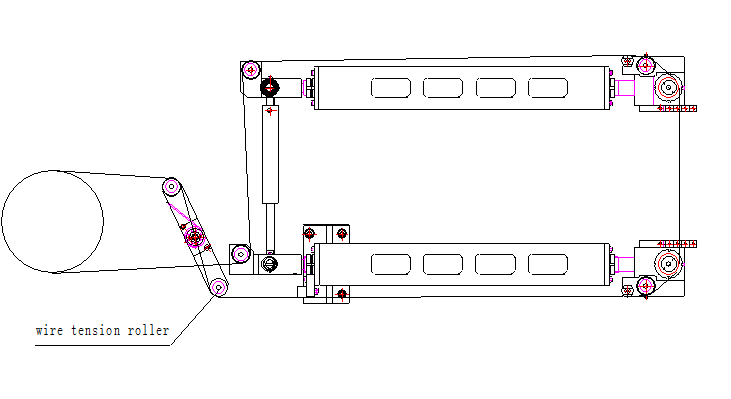
After loading, manually rotate the package clockwise to rotate the molybdenum wire 4-5 turns.
The right block hits the right proximity sensor.
Press the right silk tube switch, the silk tube rotates, and the whole part of the silk tube slides to the right. Be sure to stop the spool when it is close to the end of the wire.
Note: At the end of this step, turn the right strike block to the maximum stroke on the right side.
5, tight wire:
The left limit impactor is pressed against the left proximity sensor. Place the tensioner wheel in the position shown in the figure below, start the switch on the right side of the package, rotate the package, hold the tensioner, and manually tighten the thread in the direction indicated by the arrow. At this time, the whole part of the package slides to the left. In the process of tightening the wire, the hand should use uniform tension to tighten and eliminate the loosening gap. Be sure to stop the spool when it is close to the end of the wire. Adjust the spinning wheel and fix the molybdenum wire.
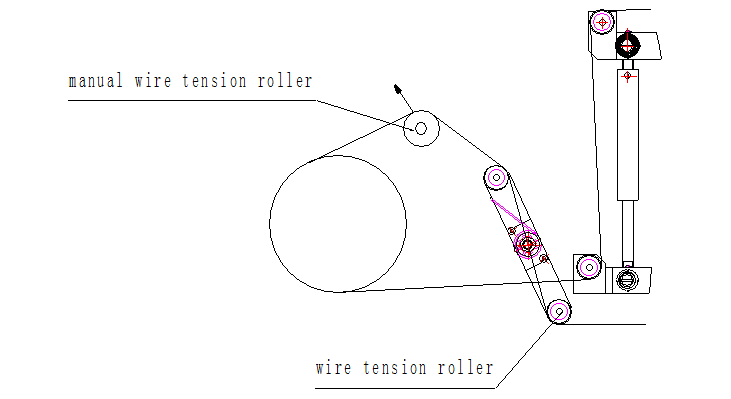
Note: When operating this step, turn the right hit block to the maximum stroke on the right, and pay close attention to the end of the wire. Stop the spool in time to prevent it from being broken.
6, adjust the molybdenum wire:
Adjust the position of the left and right impact blocks, and use a 4-5mm standby amount in the axial direction of the molybdenum wire to maintain left and right commutation.
7, adjust the processing of normal wire speed, inverter knob index between 35-45.
Learn more information about our molybdenum wire for cutting machine,contact us by EMAIL:rmd1994@yeah.net
